related blog
%20(3).svg)
14
Roofing Photo Documentation Guide (2026) - Checklist, Examples, & Best Apps
Ensure your roofing projects are documented effectively to prevent claim denials and streamline insurance processes with our comprehensive guide.
Roofing projects often fail when photo documentation is disorganized or incomplete. Missing or poor-quality images can lead to denied insurance claims, disputes, and wasted time. By 2026, insurers demand clear, timestamped photos that detail every stage of a roofing project. This guide provides a step-by-step checklist to ensure you document everything properly - from initial inspections to final cleanups. It also highlights tools and methods to improve photo quality and organization, helping contractors avoid setbacks and speed up claims.
Key Takeaways:
- Why It Matters: Clear documentation prevents claim denials and builds trust with insurance adjusters.
- What to Document: Pre-job conditions, hidden damage during tear-offs, installation progress, and final results.
- How to Improve: Use structured workflows, timestamps, GPS tagging, and cloud storage for better organization.
- Best Practices: Match before/after angles, maintain consistent lighting, and use drones for hard-to-reach areas.
Want to simplify this process? Use a professional system with features like checklists, cloud storage, and team collaboration to ensure no critical photo gets missed.
Stop Sending Photo Reports | How to Actually Prove a Roof Claim
Complete Roofing Photo Documentation Checklist
A well-organized roofing photo documentation checklist is essential for avoiding errors, reducing unexpected costs, and creating a visual record that meets insurance standards.
Before Job / Initial Inspection
The first step is to document the roof’s condition before any work begins. These photos establish a baseline, highlight pre-existing damage, and help prevent disputes later.
- Full roof elevations: Take wide-angle shots of all four sides of the building. Capture the entire roof from ground level, ensuring the full roof plane is visible. These images provide a clear overview of the roof’s pre-job condition.
- Slope measurements: Document the steepness of each roof section. Include reference points like gutters or eaves to help adjusters understand the pitch, which affects material and labor estimates.
- Detailed damage documentation: Photograph close-ups of issues like missing shingles, exposed nail heads, granule loss, or cracks. For hail damage, include a quarter or business card in the shot for scale.
- Flashing and penetration points: Focus on areas like step flashing, chimney flashing, valley flashing, and pipe boots. These are common trouble spots that justify repair or replacement.
- Gutter systems and downspouts: Capture any dents, separations, or other damage. Include images of mounting hardware and fascia boards, as they often require attention after severe weather.
- Interior moisture evidence: Take photos inside the attic showing water stains, damaged insulation, or wet decking. These images prove that roof damage has impacted the building’s interior and justify related repairs.
Once the initial inspection is complete, move on to the tear-off phase to uncover and document hidden issues.
Tear-Off Phase
During tear-off, you’ll often find damage that wasn’t visible during the initial inspection. Photographs taken at this stage are critical for securing additional compensation and addressing unexpected repairs.
- Underlayment condition: Document the state of the existing felt or synthetic underlayment as it’s removed. Capture tears, wear, or improper installation that contributed to leaks.
- Decking assessment: Take photos of soft spots, water damage, or delaminated decking. Show both the damaged areas and the surrounding material.
- Nail pattern documentation: Highlight issues like overdriven nails, missed nail zones, or improper fastener patterns. These details can justify a full replacement rather than a simple overlay.
- Structural discoveries: Photograph damaged rafters, broken trusses, or other structural issues uncovered during tear-off. These findings often require additional evaluations and costs.
- Flashing removal: Show the condition of old flashing and the substrate underneath. Capture corrosion, poor installation, or damage around flashing areas.
With all underlying issues documented, proceed to the installation phase to record the repair process.
Installation Phase
Photos during the installation phase show that repairs were done correctly and meet industry standards. This documentation is crucial for warranties and insurance claims.
- Starter strip installation: Capture the placement and fastening of starter strips. Show that they extend beyond the drip edge and meet manufacturer guidelines for wind resistance.
- Shingle installation progress: Take periodic shots as shingles are installed. Include images showing proper alignment, fastener placement, and how shingles integrate with roof edges and penetrations.
- Ridge and hip installation: Document these critical areas with clear photos of fastener patterns and weather seals, highlighting their role in preventing water and wind damage.
- Flashing replacement: Photograph each step of flashing installation, from substrate preparation to sealing techniques. Include close-ups of overlaps and sealing to show proper workmanship.
- Ventilation system installation: Show intake and exhaust vents, their placement, and how they integrate with the roof. Ensure photos demonstrate compliance with building codes for attic ventilation.
Once the installation is complete, wrap up with a thorough final inspection.
Final Inspection / Close-Out
The final phase ties everything together, providing a complete record of the finished project. These photos demonstrate the transformation and serve as proof of quality workmanship.
- Completed roof elevations: Take shots from the same angles as the initial inspection to highlight the improvements. These before-and-after comparisons are valuable for homeowners and adjusters.
- Drone overview shots: Use aerial photography to capture the entire roof, including details that ground-level photos might miss. These images should showcase clean lines and professional installation.
- Detail finish work: Photograph ridge lines, valleys, flashing, and seals to show precision. Include images of gutter and downspout reinstallation, as well as any trim work.
- Cleanup verification: Document the job site after cleanup. Include photos of removed debris, protected landscaping, and tools like magnetic nail sweepers to show thorough site management.
- Material documentation: Photograph any leftover materials provided to the homeowner, such as extra shingles or flashing. This prevents disputes over unused materials later.
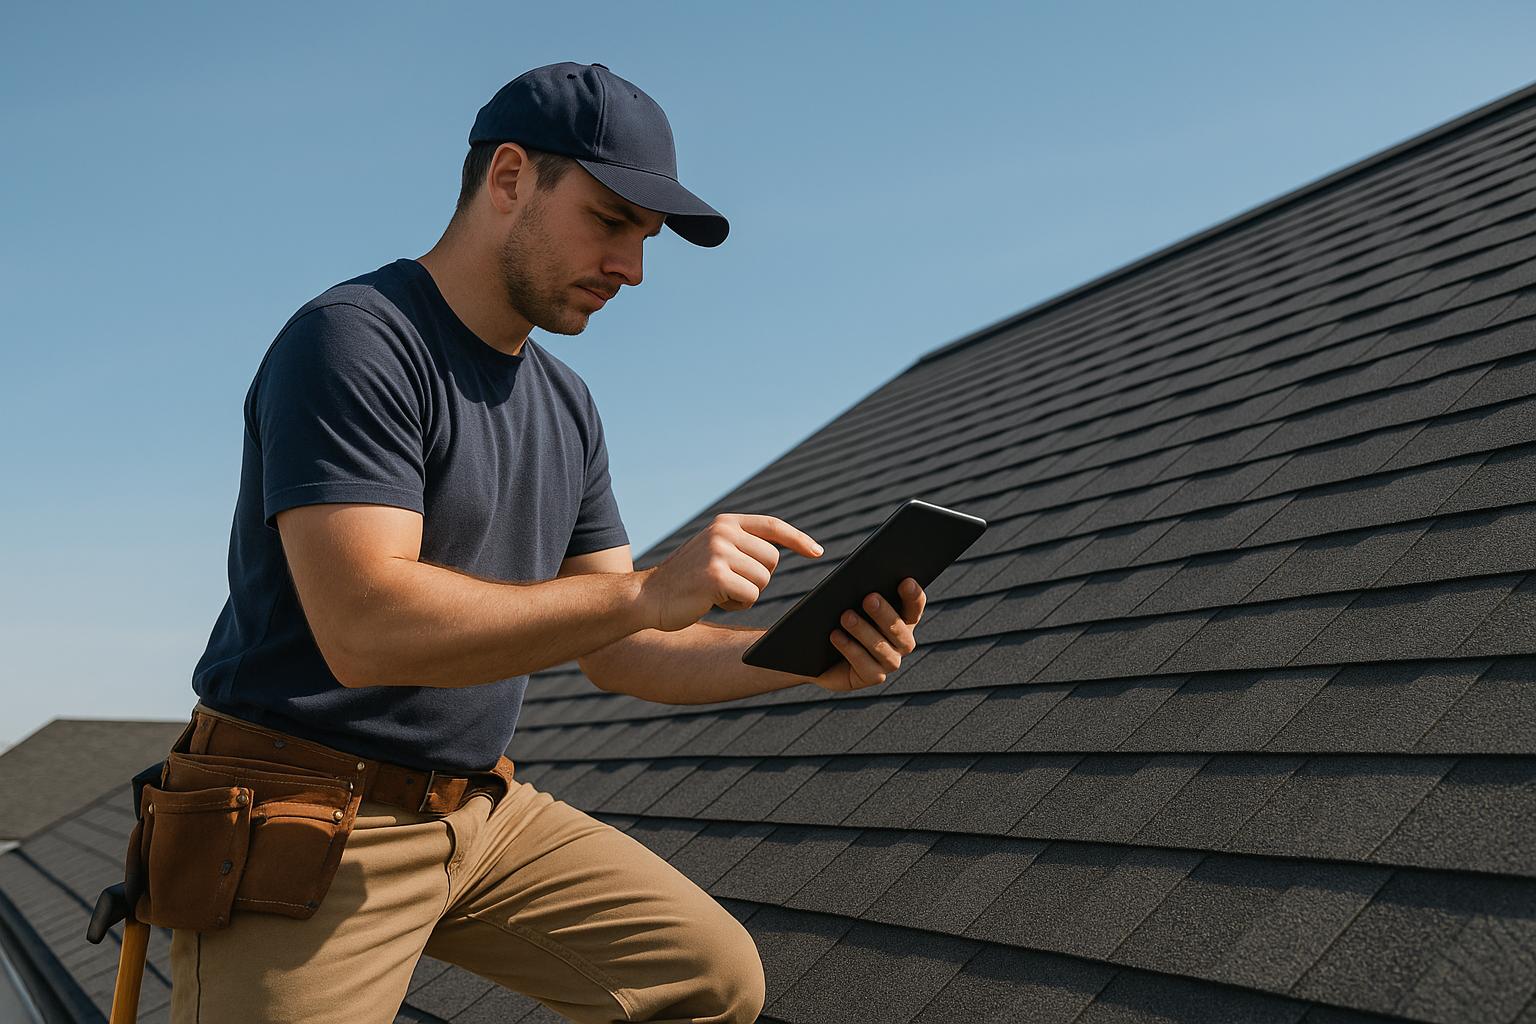
How to Take Quality Roofing Photos
Taking quality roofing photos isn’t just about snapping a picture - it’s about creating clear, detailed evidence that can prevent disputes and denied claims. A solid approach to roofing photography supports an efficient, step-by-step workflow that every contractor can rely on.
The secret to professional-grade roofing photos lies in capturing a variety of perspectives. This includes ground-level shots, aerial drone images, and angled views to ensure no detail is overlooked.
Lighting is everything. Aim to take photos during daylight hours when natural light is at its best. Avoid shooting directly into the sun to prevent shadows from obscuring damage. Early mornings or late afternoons often provide the most even and balanced lighting.
Sharp focus is non-negotiable. Blurry images won’t cut it for adjusters or in legal situations. If your phone struggles to focus, tap the screen on the area you want clear.
Proper Hail Damage and Storm Photos
When documenting storm damage, precision and thoroughness are key.
- Use scale references like a quarter or business card to show the size and depth of damage. Place these next to each impact for insurance and documentation purposes.
- Capture damage from multiple angles. Take a mix of close-ups, medium-range shots, and wide views to fully document each detail.
- Separate different types of damage. For example, hail impacts differ from wind-related creases or missing shingles. Each type of damage tells a unique story about the storm.
- Don’t forget soft metals and accessories. Gutters, vents, flashing, and downspouts often show damage more clearly than shingles. These photos can serve as critical evidence, especially when shingle damage is subtle.
- Photograph granule loss patterns. Severe hailstorms often leave distinct signs, like exposed mats or granules collecting in gutters or on the ground. Be sure to capture these.
Before/After Photos for Roofing Jobs
Showing the transformation of a roofing project is just as important as documenting damage.
- Match your angles. Use the same camera positions for before and after shots. Landmarks or marked photo locations can help you maintain consistency.
- Keep lighting consistent. If your before photos were taken in the morning, aim to take the after photos at the same time of day. This ensures the changes you’re highlighting are clear and not influenced by lighting differences.
- Show the entire roof system. Don’t limit your photos to shingles. Include gutters, vents, flashing, and other components that are part of the project.
- Take progress photos. Capture key stages like tear-off completion, decking repairs, and major installations. These images create a visual timeline of your work.
- Document interior changes when needed. If your project involves fixing leaks or improving ventilation, take before and after photos inside the building. Shots of water stains, damaged insulation, or upgraded ventilation systems can highlight the impact of your work.
Photos That Meet Insurance Adjuster Standards
Meeting insurance adjuster requirements can make the claims process smoother and reduce requests for additional documentation.
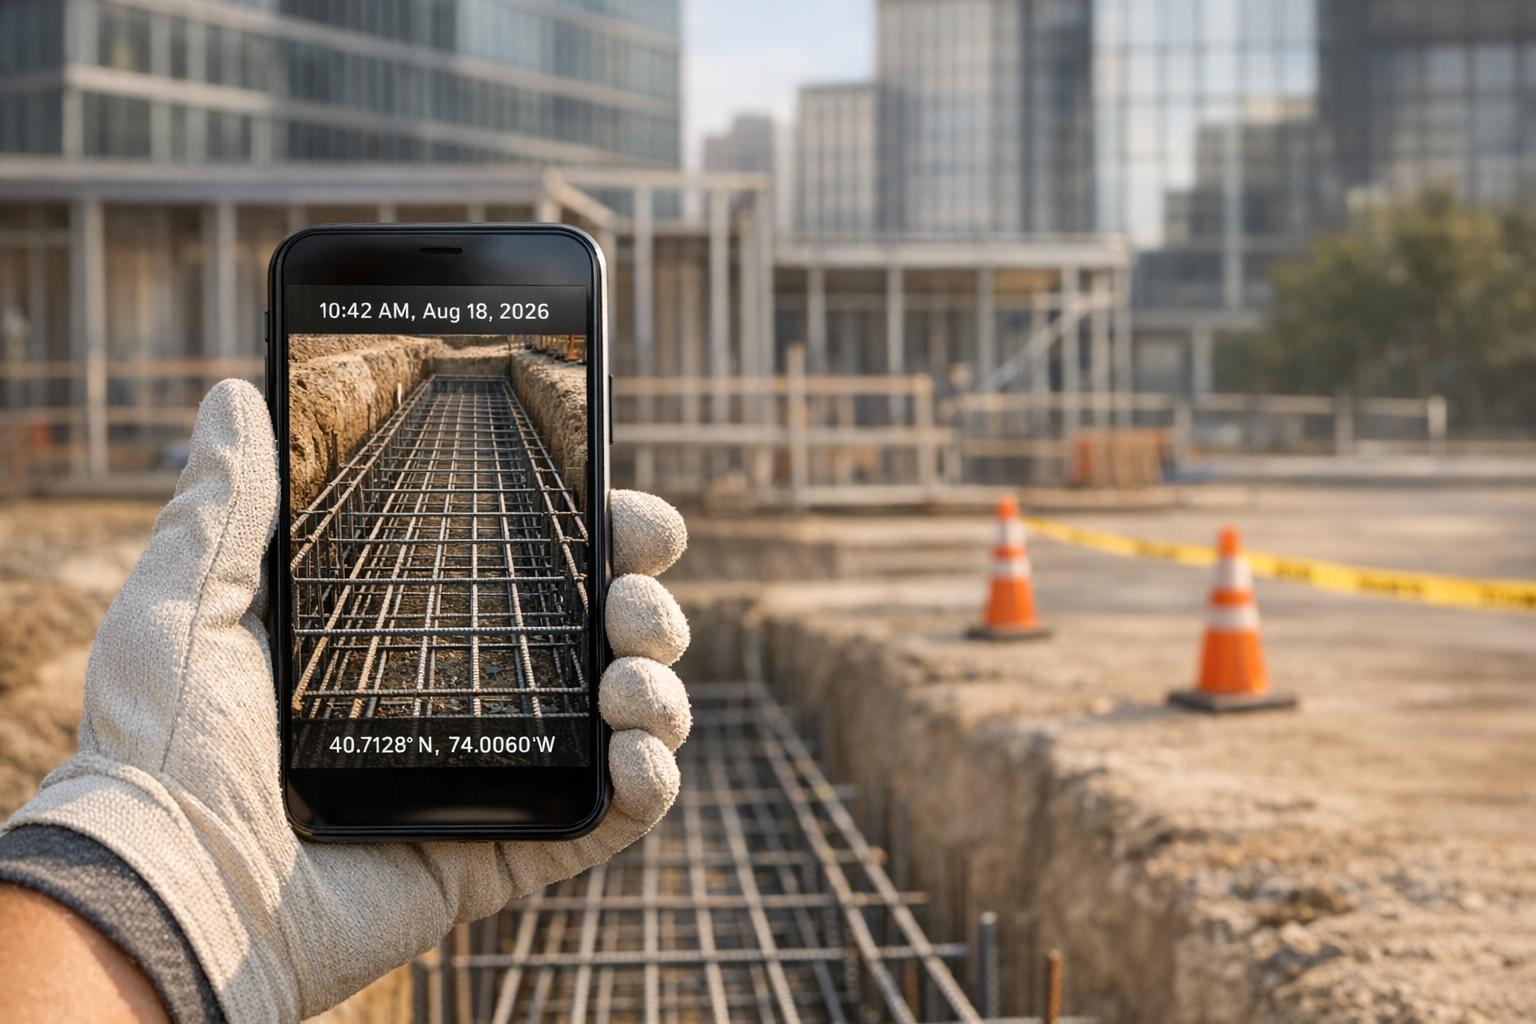
- Enable timestamps and location stamps. Most smartphones can automatically embed this information. Make sure these features are turned on so adjusters can verify when and where the photos were taken.
- Organize your photos to tell a story. Start with wide overview shots, then move to medium-range images, and finish with detailed close-ups. This sequence helps adjusters understand the full scope of the damage.
- Include measurement references. Use tape measures, rulers, or similar objects to provide a clear sense of scale for the damage.
- Photograph pre-existing conditions separately. If you spot damage unrelated to the current event, document it on its own and note it in your records. This helps focus attention on storm-related issues.
- Use drones for hard-to-reach areas. Many parts of a roof can’t be safely accessed from the ground. Drone photography can capture these sections thoroughly.
Professional roofing photography isn’t just about taking pictures; it’s about understanding what adjusters need to see. By following these standards, you can create a photo system that meets insurance requirements and sets you apart from amateur efforts. The next section will dive deeper into building such a system.
Photo Requirements for Insurance and Xactimate

When filing an insurance claim or working with Xactimate, photographic evidence is non-negotiable. Every repair line item on your claim must be backed by clear, detailed images. These photos form the cornerstone of documentation that satisfies both insurance companies and Xactimate standards.
Xactimate Photo Standards for Roofing Estimates
For roofing estimates, Xactimate expects photos that clearly align with each repair item listed. This means capturing damage from multiple angles to provide a complete picture. If the damage involves interior areas, make sure to document all affected surfaces thoroughly. This multi-angle approach ensures no detail is missed, giving adjusters the visual proof they need to evaluate claims accurately.
Meeting Insurance Documentation Requirements
Insurance companies depend on detailed visual records to process claims effectively. While each insurer may have slightly different guidelines, high-quality images that showcase the full scope and context of the damage are essential. These photos not only strengthen the credibility of your estimate but can also help speed up the claims process.
sbb-itb-5f4c686
Problems with Phone Photos and Basic Storage
Many contractors still rely on personal phones and basic storage methods to document jobsites. While this might seem convenient and low-cost, it can lead to major headaches when reliable documentation is needed for things like insurance claims, warranty disputes, or quality control checks.
Disorganization and Missing Information
When your crew is texting photos or storing them randomly on personal devices, it’s a recipe for chaos. Moving images from SD cards into unorganized folders eats up time, and this lack of structure can derail claims and make team collaboration a hassle.
One big issue is the absence of critical metadata. Photos scattered across devices often don’t include GPS coordinates, timestamps, or proper file names. This lack of context makes it hard for insurance adjusters to verify when and where photos were taken. For example, without timestamps, it’s nearly impossible to prove whether damage photos were captured before or after repairs, which can weaken your claim.
Another problem is mixing work and personal photos. Storing jobsite images alongside personal snapshots creates clutter and makes it harder to find what you need. If key details aren’t properly documented, your evidence could fall apart under scrutiny.
Crew Collaboration Problems
The challenges don’t stop at storage - documenting jobsites inconsistently also disrupts teamwork. Different crew members often use different methods: one might text photos, another might upload them to a personal cloud, and someone else might forget to take pictures altogether. This patchwork approach leaves gaps in documentation that can be glaringly obvious when you’re trying to compile a complete set for an insurance claim.
Sharing these scattered photos with adjusters or homeowners becomes a logistical nightmare. Instead of sending a well-organized gallery, you could find yourself forwarding endless text messages or piecing together random email attachments. Without a centralized system, locating specific images quickly is nearly impossible.
Even worse, there’s always the risk of losing important photos entirely. Crew members might delete images, lose them during phone upgrades, or suffer device malfunctions. Without automatic backups and a structured way to organize projects, critical documentation could vanish, jeopardizing your ability to support an insurance claim.
Features of a Professional Roofing Photo System
Traditional methods of photo documentation often result in scattered images and disorganized storage, causing unnecessary headaches for roofing contractors. A professional roofing photo system provides a much-needed solution, addressing these issues while simplifying workflows for insurance claims, quality control, and customer communication.
Core Features for Better Photo Documentation
A well-designed roofing photo system starts with automatic project organization. Photos should be sorted by job site, date, and project phase without any manual effort. This makes it easy to locate specific images when adjusters or clients request them, saving time otherwise spent digging through endless texts or camera rolls.
GPS and time-stamped photos are a must for reliable documentation. Each image should include precise location data and an unchangeable timestamp, offering clear proof of when and where the photo was taken. This eliminates doubts about authenticity, which can often slow down claims processing.
Unlimited cloud storage is another critical feature, especially during large storm jobs. The system should handle thousands of high-resolution images without running out of space, ensuring that crews never have to delete important photos just to free up storage.
Checklist-driven workflows are essential for thorough documentation. These workflows guide users through capturing all necessary shots at each project phase - whether it’s pre-job inspections, tear-off documentation, installation progress, or final completion. This ensures no critical image, like one showing flashing installation, is accidentally missed.
Offline capabilities are vital for job sites with poor internet coverage. Crews should be able to capture and organize photos without any connectivity, with the system automatically syncing everything once they’re back online. This prevents gaps in documentation caused by unreliable networks.
Photo tagging and filtering make it easy to categorize images by damage type, material, or project phase. Tags like "hail damage", "before", "after", "decking", or "flashing" allow quick retrieval of specific images when needed, streamlining the review process.
Team collaboration features keep everyone aligned. Crew members can upload photos in real time, instantly updating the project status. This prevents redundant work and ensures every aspect of the job is documented thoroughly.
Benefits for Contractors, Adjusters, and Homeowners
A professional photo documentation system doesn’t just make life easier for contractors - it benefits everyone involved. For contractors, the system organizes photos automatically and makes sharing them as simple as sending a link.
Insurance claim processing becomes faster and more efficient. Adjusters can quickly review well-organized photo galleries complete with timestamps and GPS data, cutting down on back-and-forth communication and speeding up settlements.
Quality control improves significantly with consistent photo documentation. Supervisors can remotely monitor progress, catching potential problems early before they escalate into costly issues - a huge advantage for contractors managing multiple crews across various sites.
Customer communication also gets a boost. Providing homeowners with organized photo galleries that document their project from start to finish builds trust and reduces disputes over work quality or project scope.
Liability protection is strengthened when disputes or warranty claims arise. Timestamped, well-organized photos provide clear evidence of proper procedures and material conditions, helping to resolve issues more effectively.
Finally, crew accountability is built into the system. With checklists and tracking features, team members are guided through every step of the process, ensuring no critical photos are forgotten. This creates consistency and reinforces accountability across all projects.
Switching from chaotic, phone-based documentation to a professional system not only improves claim processing and customer satisfaction but also enhances overall efficiency. These features simplify your workflow and pave the way for better project management.
Conclusion: Improve Your Roofing Photo Process
Enhancing your roofing photo process is a crucial step in ensuring smooth claim approvals and protecting your business in today’s insurance-driven market. Proper photo documentation isn’t just a helpful add-on - it’s a necessity.
Missing critical shots, like hail damage or decking conditions, can lead to costly claim denials. Professional photo documentation systems address this by automating organization, ensuring every key detail is captured, and creating insurance-ready galleries that adjusters can easily review. This automation not only saves time but also reduces liability and speeds up claim processing.
Your crews are already taking photos - make sure those photos work for you. A GPS-stamped, checklist-driven system ensures thorough documentation, meeting insurance requirements and covering every phase of the job. On the other hand, relying on scattered photos stored on personal devices can lead to confusion and disputes. A well-organized system builds credibility with adjusters and safeguards your business from potential conflicts.
The roofing industry is moving toward stricter documentation standards, and contractors who adapt now will position themselves ahead of the curve. Whether it’s storm damage, insurance restoration, or routine roofing jobs, having a reliable photo system in place helps secure your profits and reputation.
Want to get started? Download our free Roofing Photo Documentation Checklist to guide your crews through every critical shot and minimize mistakes. If you’re ready for a complete solution, try CrewCam for free and discover how professional photo documentation can streamline your workflow and boost your claim success rate. Don’t wait - set up your roofing photo system today and protect your next project.
FAQs
What are the advantages of using a professional roofing photo documentation system over traditional methods?
A professional roofing photo documentation system brings a host of advantages over old-school methods. These systems automatically sort photos by project, include time and GPS stamps, and allow tagging to keep everything organized. No more hunting for misplaced images or dealing with scattered files - it’s all streamlined and efficient.
On top of that, features like crew collaboration, offline access, and shareable galleries make it easier to stay connected with your team and keep stakeholders in the loop. These tools simplify workflows, save time, and ensure you have all the documentation you need for insurance claims, legal protection, or providing transparency to your customers.
How can drones be used to safely and efficiently capture roofing photos, especially for hard-to-reach areas?
Drones have revolutionized the way roofing photos are taken, especially in spots that are tough or risky to access. With high-resolution cameras, drones let roofers capture detailed images from multiple angles - no ladders or walking on precarious slopes required. This approach not only enhances efficiency but also minimizes safety hazards.
Thanks to their bird's-eye perspective, drones excel at inspecting tricky areas like chimneys, roof valleys, and steep inclines. They can quickly capture a full view of the roof, ensuring all details are documented. This makes them indispensable for tasks like insurance claims, assessing storm damage, or comparing before-and-after conditions.
What features should a roofing photo app have to meet insurance adjuster requirements?
To make sure your roofing photo documentation aligns with insurance adjuster expectations, choose an app that offers these key features:
- Time and location stamps: These verify exactly when and where each photo was taken, adding credibility to your documentation.
- Organized photo sequences: A structured workflow - from the initial inspection to the final cleanup - ensures your photos tell a clear, chronological story.
- Detailed evidence: Include close-ups of damage, material conditions, and completed repairs to back up every line item in your claim.
By using these tools, you can simplify the claims process, minimize back-and-forth with adjusters, and ensure no critical details are overlooked.
Related Blog Posts


See CrewCam in action
Start your free trial now by clicking the button below


Wanna chat or demo?
Questions? Concerns? Requests? Talk to a real human

Watch a CrewCam demo now 😎
Short on time, busy, got jobs to do? See how CrewCam works now!