related blog
%20(3).svg)
Innovation
13
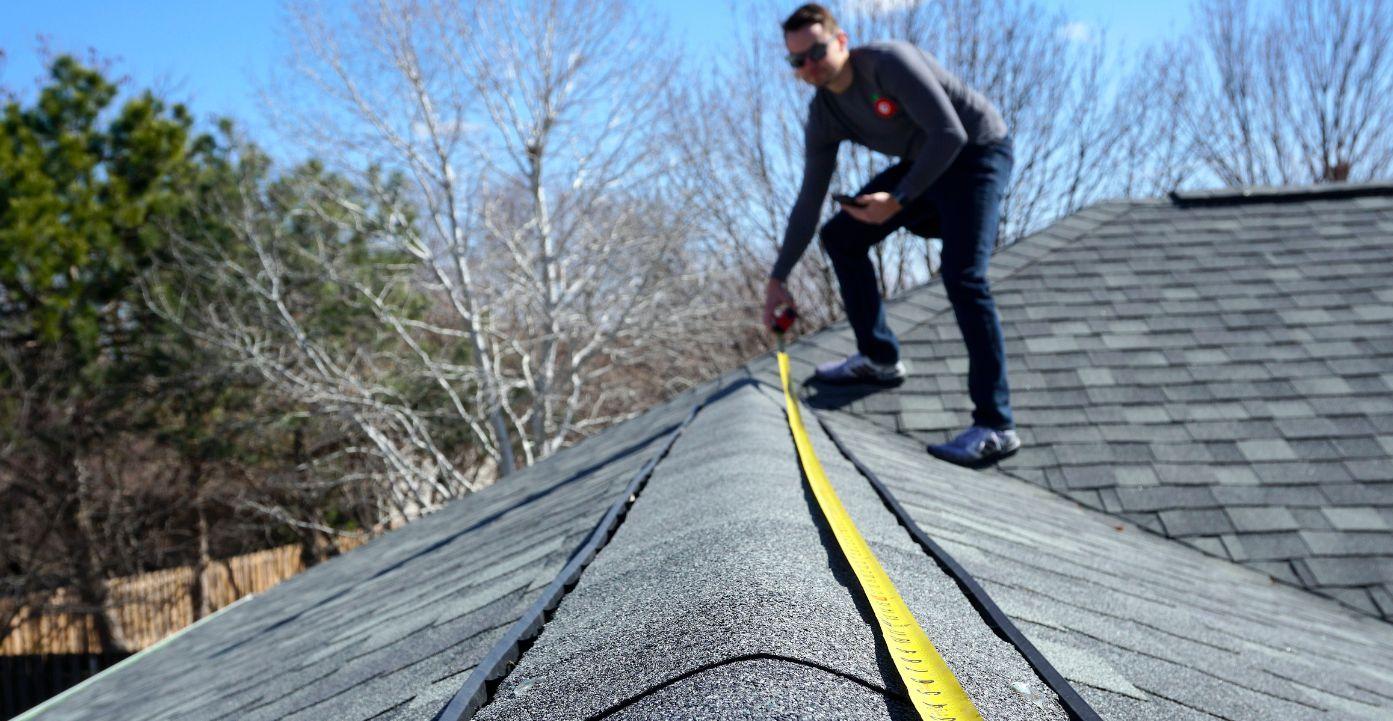
How Roofing Contractors Use CrewCam for Efficient Photo Documentation
Explore how contractors streamline roofing photo documentation with organized, efficient systems that enhance quality control and reduce risks.
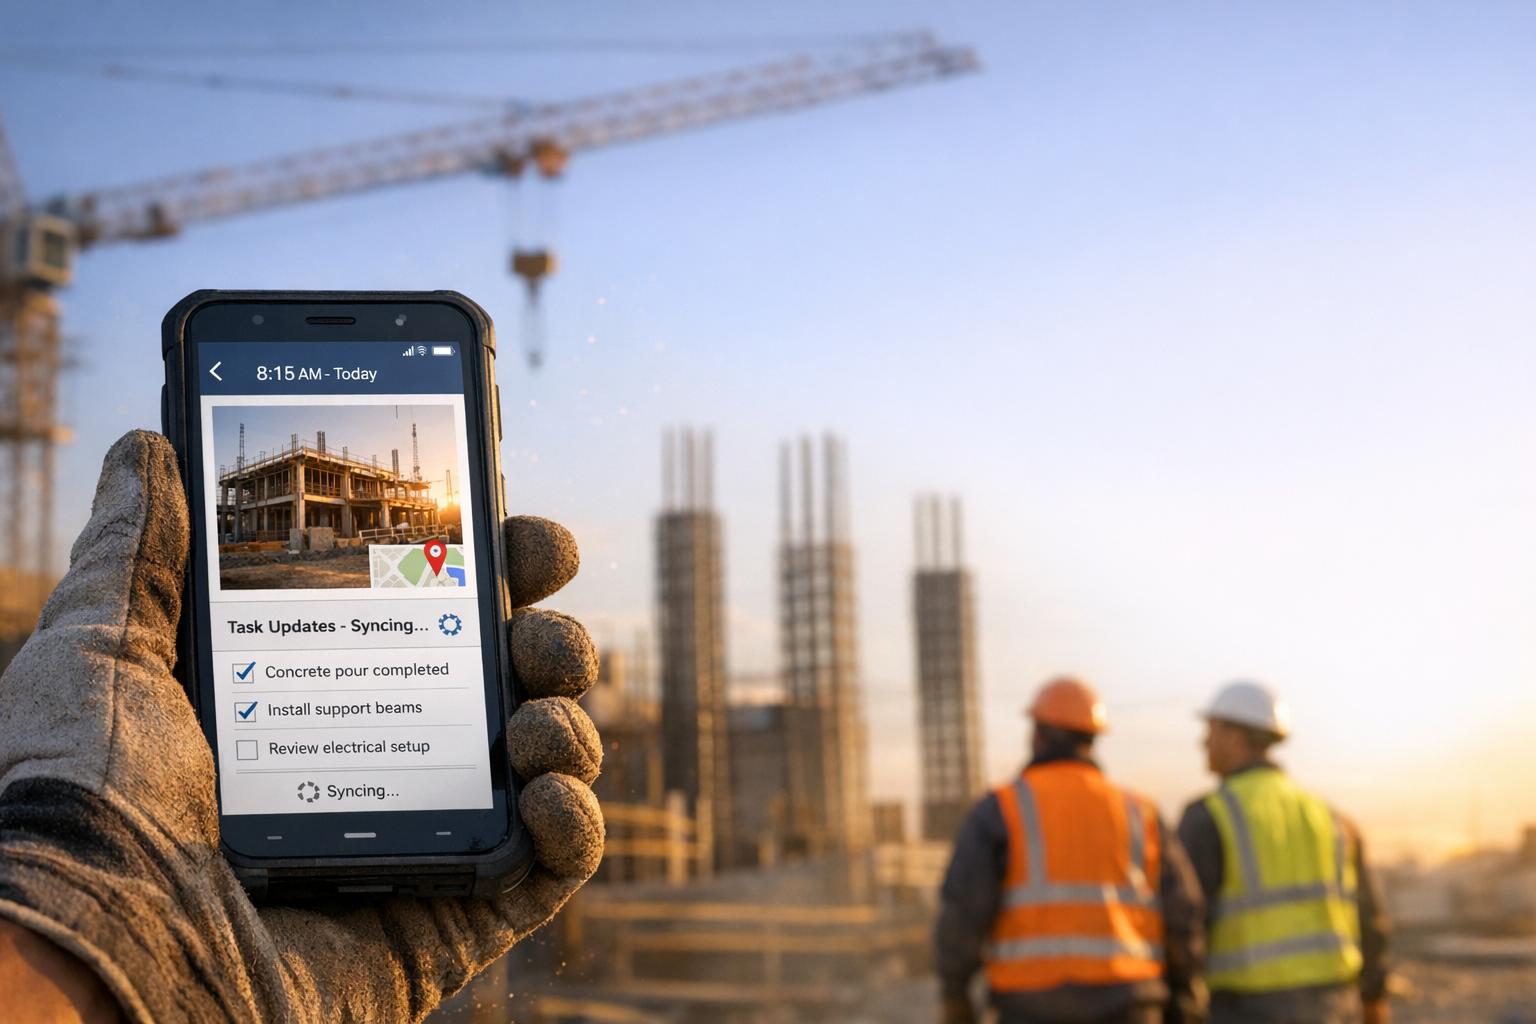
Roofing contractors face challenges like liability protection, insurance claims, and ensuring project quality. CrewCam simplifies these tasks by organizing photo documentation with time-stamped, GPS-tagged images. It replaces chaotic traditional methods with a streamlined system, improving communication and reducing risks. Key features include:
- Project Setup: Add location, job details, and insurance info.
- Photo Checklists: Standardize documentation for pre-work, during-work, and final inspections.
- Annotations & Tags: Highlight key details and improve clarity.
- Offline Mode: Save photos locally in low-connectivity areas.
- Organization: Filter photos by date, tags, or location for quick access.
- Sharing Tools: Create link-based galleries for clients, insurers, and inspectors.
- Access Control: Manage permissions to keep data secure.
CrewCam also supports quality control by enabling foremen to follow daily photo routines and office staff to review and approve work. This ensures accurate records, reduces disputes, and builds trust with stakeholders. By transforming photo documentation into a structured process, CrewCam helps contractors save time, avoid costly errors, and maintain professionalism.
Setting Up CrewCam for Roofing Photo Documentation
Getting CrewCam set up properly not only saves time but also ensures your roofing documentation runs smoothly from start to finish. The process focuses on three key areas to help streamline every project.
Creating Projects with US Address and Job Details
To get started, create a new project in CrewCam:
- Log in and click "+ Create Project" (or tap "+ Project" or the camera icon on mobile).
- Use the map pin or GPS coordinates to enter the project location.
- Add project details, including the full street address (with ZIP code), roof type (asphalt, metal, tile), pitch, square footage, and any related insurance claim numbers.
- Once everything is filled out, tap "Create Project."
For rural properties where street addresses aren’t available, GPS coordinates can pinpoint the location accurately.
Once your project is set up, you’re ready to standardize photo documentation with customized checklists.
Building Roofing Photo Checklists
Photo checklists are essential for making sure your crew documents every critical stage of a roofing project. CrewCam’s checklist feature helps you maintain consistency across all jobs.
Set up checklists for different phases of the project, such as:
- Pre-work: Document existing roof conditions, gutters, and other starting points.
- During-work: Include items like decking, underlayment, and flashing.
- Final inspection: Capture details like ridge caps, cleanup, and multi-angle reviews.
You can also adapt checklists to meet specific local building codes. For example, include ice dam protection for colder climates or hurricane strapping for coastal areas.
Each checklist item can include detailed instructions for your crew. For instance, under "flashing installation", you might add a note like “photograph step flashing behind each course” to ensure clarity.
With your checklists in place, you can further enhance your documentation by using tags, annotations, and offline capabilities.
Setting Up Tags, Annotations, and Offline Mode
Tags and annotations help turn your photos into detailed, searchable records that tell the full story of your project. Use consistent tags like "preexisting damage", "change order", "warranty issue", or specific materials such as "architectural shingles."
Annotations allow you to highlight key details directly on your photos. Use arrows, circles, or text to emphasize important points, such as marking areas where decking was replaced or showing proper flashing installation techniques. These tools make it easier to communicate quality work, identify problem areas, or explain repair methods.
For projects in areas with poor connectivity, enable offline mode. This ensures that photos and annotations are saved locally until you’re back online, so no documentation is lost, and your crew can stay productive in low-signal environments.
Taking High-Quality Photos for Roofing Documentation
Clear, high-quality photos are essential for creating a reliable record of your roofing work. They help avoid disputes and provide a comprehensive visual history of the project. With CrewCam's tools, you can capture images that tell the entire story - from start to finish.
Photo Composition and Coverage Best Practices
Follow the W-M-C sequence for effective photo documentation: wide, medium, and close-up shots.
- Wide shots: Start with a wide view to provide context, such as the street address or an identifiable landmark. This establishes where the work is being performed and is crucial for insurance claims or warranty issues.
- Medium shots: These should cover each roof section, showing the overall condition, materials, and the scope of the work. Make sure the details are clear enough to identify patterns and installation quality.
- Close-up shots: Focus on technical details like fastener patterns, seam overlaps, nail placement, flashing installation, and sealant application. These shots verify proper installation and compliance with guidelines.
When documenting roof penetrations - like vents, skylights, and chimneys - use the same W-M-C method. Pay extra attention to edges (eaves, rakes, and drip edges) and transitions (valleys, parapets, and wall terminations). Don’t forget drainage components such as gutters, scuppers, and downspouts.
Lighting plays a big role in photo quality. Adjust your position to minimize glare or shadows, and if necessary, wait for better light to capture reflective or low-light details. By following this structured approach, you’ll ensure thorough documentation of every project phase.
Documenting Before, During, and After Project Phases
Before photos are your safety net. They establish the roof’s initial condition and protect you from future liability claims. Document pre-existing damage, such as hail bruises, lifted shingles, ponding areas, or soft decking. Also, capture any code violations, like missing drip edges or insufficient ice barriers. Don’t forget to photograph material deliveries alongside packing slips to confirm quantities and specifications.
The during phase is all about systematic documentation. Cover every step, starting with substrate inspections and any repairs to decking or structural elements. Photograph underlayment and ice-and-water shield installations, showing overlaps and coverage. Record shingle or membrane installation, including fastener placement and patterns, to demonstrate adherence to manufacturer guidelines.
Flashing installation deserves special focus. Document the process step-by-step, including base flashing, counterflashing, and sealant application. If weather conditions impact installation or material performance, include weather logs for reference.
Final documentation showcases the quality of your completed work. Capture the finished roof from multiple angles, highlighting terminations, edge metal installations, and sealant applications. Include photos of any water tests performed and attic or ceiling areas to confirm no leaks occurred during the project.
Lastly, take site cleanup photos to show professionalism and avoid disputes about property damage. Photograph warranty labels and any manufacturer certifications tied to the installation.
Using Annotations and Notes for Clarity
Once you’ve customized your photo checklist, use annotations to enhance clarity. CrewCam’s annotation tools allow you to turn photos into detailed technical records. Use arrows and circles to highlight key details, such as areas where decking was replaced or proper flashing techniques. Text annotations are great for explaining complex repairs or noting deviations from standard procedures.
When documenting defects or compliance issues, make your annotations crystal clear. Circle the problem, add an arrow pointing to it, and include a brief explanation of what needs fixing. This eliminates confusion during reviews and helps field crews address the issue directly.
For change orders, annotations can clearly mark differences in scope compared to the original plans. Include measurements and note any extra materials or labor required. These detailed annotations support billing discussions and minimize payment disputes.
If weather affects your project, document delays or challenges with time-stamped annotations. Note conditions like temperature, wind speed, or moisture levels that impact material performance or safety. CrewCam’s timestamp feature, combined with your annotations, creates a thorough record of project conditions and decisions, making communication smoother and reducing risks.
Organizing Photos and Team Collaboration
When you're managing hundreds of photos across various roofing projects, being able to locate specific images quickly is a game-changer. CrewCam offers organizational tools that turn your photo library into a searchable database while keeping your team connected and aligned throughout every phase of a project.
Organizing Projects and Filtering Photos
CrewCam's filtering system makes it easy to find exactly what you're looking for. You can filter photos by date, tags, or GPS location, which is incredibly useful when insurance adjusters ask for details about work completed on specific dates. For example, if you need all photos tagged "flashing" or "final inspection", you can pull them up in seconds.
Each project is organized separately, ensuring photos from different properties never get mixed up. This is especially helpful when you're juggling multiple residential and commercial projects. Every project has its own photo timeline, allowing you to track progress and pinpoint specific phases, like installation or inspections, without confusion.
The search feature adds another layer of efficiency. Type in keywords like "valley flashing", and CrewCam will instantly pull up all related photos, including those with annotations or notes. You can even filter by team member to see who captured specific images, which helps with accountability and quality control.
GPS tags are a lifesaver when working on large commercial sites with multiple roof sections. These tags allow you to quickly identify which building or area each photo corresponds to, making it easier for property managers overseeing multiple locations to stay organized.
With this level of organization, sharing detailed photo galleries with stakeholders becomes a breeze.
Sharing Photo Galleries with Stakeholders
CrewCam simplifies sharing by using link-based galleries. Forget about emailing bulky files or burning DVDs - just create a photo gallery that tells your project's story and share it with a single web link. Homeowners can check progress from their phones, while insurance adjusters get complete documentation packages without needing to install an app or set up an account.
Selective sharing gives you full control over what stakeholders see. For example, you can send homeowners a gallery showcasing before-and-after images of your work, while insurance adjusters receive detailed damage and repair documentation. General contractors can view progress photos to coordinate with other trades, and building inspectors can review installation details remotely before site visits.
Real-time updates are another standout feature. As you add new photos to a shared gallery, stakeholders automatically see the latest images. This not only keeps everyone informed but also builds trust and streamlines processes like insurance claim tracking.
Plus, CrewCam's galleries look polished and professional. Photos are displayed in chronological order with timestamps and GPS details, creating a clear and detailed record of your work - perfect for demonstrating your dedication to quality.
Managing Access and Maintaining an Audit Trail
CrewCam doesn’t just help you organize and share photos; it also provides robust tools for managing access. Role-based permissions ensure that everyone sees only what they need. For instance, field crews can upload photos but can’t delete them, while office managers retain full control over the library. This setup protects your documentation and ensures smooth workflows.
Temporary access for external collaborators is another smart feature. Insurance adjusters can review claims, and building inspectors can access relevant documentation for permits - all without compromising security. Once a project wraps up, you can revoke access to maintain long-term control over your records.
CrewCam’s cloud infrastructure ensures your photos are securely stored for the long haul. Whether it’s months or years after a project is completed, you’ll have access to records for warranty work or legal needs.
The platform also supports desktop access, which is ideal for office staff who prefer working on larger screens. This makes it easier to review projects in detail and prepare comprehensive reports for clients or insurance companies. Whether on mobile devices or desktops, CrewCam ensures your entire team can collaborate effectively, no matter where they are.
sbb-itb-5f4c686
Quality Control and Risk Reduction with CrewCam
Managing roofing quality effectively means catching potential problems early, and that requires structured documentation. CrewCam transforms photo documentation into a tool that not only improves project efficiency but also reduces risks for your business and clients. By using quality photo documentation, you can cut down rework costs by 25% through early problem detection. Plus, teams that follow systematic photo capture processes can identify issues weeks earlier than traditional inspection methods.
Daily Photo Checklists for Foremen
Foremen are your first line of defense against quality issues, and with CrewCam's checklist feature, they can ensure no detail is overlooked. Start each day by documenting site conditions, weather, and material deliveries. This establishes a baseline for the day’s work.
Throughout the day, conduct mid-shift photo checks every two to three hours. Capture critical details like flashing, overlaps, and fasteners, and annotate any irregularities. This real-time documentation helps identify alignment issues or material defects before they escalate into larger problems.
At the end of the day, take photos to document site completion and safety measures. These images should include secured materials, covered areas, and cleaned gutters. Not only do these photos protect against liability claims, but they also show professionalism to property owners who might visit the site after hours.
Consistency is key. When foremen follow the same photo routine daily, you create a detailed visual record of every project phase. This systematic approach enables field teams to achieve 93% faster photo retrieval by using standardized naming protocols.
Office Review and Approvals Process
Your office team provides a second layer of quality control, identifying issues that might be missed in the field. Establish a daily photo review process, where office staff examine uploaded images within 24 hours. Look for deviations from plans, material quality concerns, and workmanship issues. These reviews ensure proper installation, monitor alignment, verify material quality, and confirm code compliance.
When problems are spotted, CrewCam’s annotation tools allow office staff to mark specific areas and request additional documentation. The platform’s real-time communication ensures that field crews receive feedback immediately, enabling quick corrections before work progresses. This proactive approach is crucial, as quality control failures cost the U.S. construction industry $31.3 billion annually.
Linking daily reports with time-stamped photos creates a clear audit trail. This comprehensive documentation reduces quality control losses by 65% because issues are detected and resolved quickly. This thorough review also lays the groundwork for creating a complete and professional closeout package.
Creating a Complete Closeout Package
A well-organized closeout package not only protects your business but also builds trust with clients. CrewCam simplifies the process of compiling documentation that tells the full story of your project.
Start with before-and-after comparisons to highlight the transformation. Use CrewCam’s gallery feature to showcase side-by-side views of damaged areas and completed repairs. Include wide-angle shots of the entire roof system, along with detailed images of critical areas like penetrations, transitions, and edge details.
Add annotated highlights to give your documentation a polished, professional touch. Mark key elements such as warranty seals, inspection points, and maintenance access areas. These annotations act as a reference for property owners and future contractors. Include notes about special materials, installation techniques, or unique site conditions that influenced the work.
Your closeout package should also feature approved checklists with timestamps, showing when each phase was completed and verified. Export these checklists as PDFs to share with clients, insurance adjusters, or building officials. A clear timeline demonstrates adherence to project schedules and quality standards.
Organize the final gallery chronologically, with clear section breaks for different project phases. Include a cover page with project details, crew information, and contact details for future reference. This level of organization not only impresses clients but also ensures you have the documentation needed for warranty claims and future maintenance.
Conclusion: Getting the Most from CrewCam for Roofing Documentation
CrewCam takes roofing photo documentation to the next level, turning it into a tool that enhances your business operations. Its advanced features ensure every project detail is captured and organized, making workflows smoother, minimizing risks, and improving client relationships.
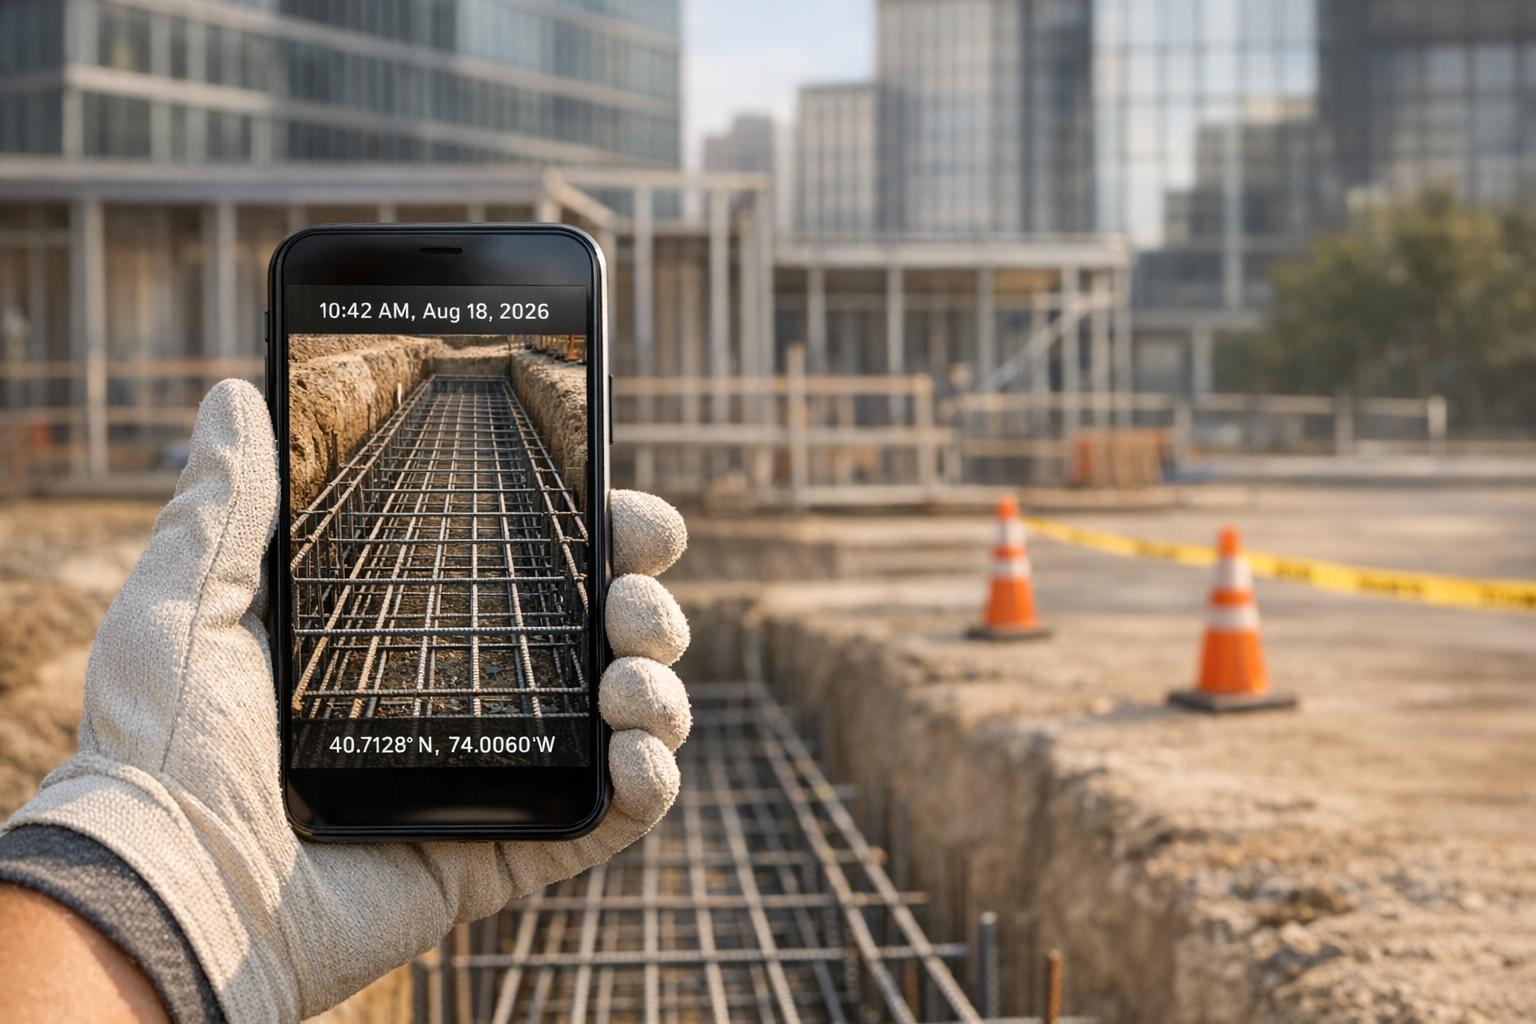
With GPS-tagged, time-stamped photos and unlimited cloud storage, you get a rock-solid record to protect against disputes and earn client trust. Pair these with photo checklists and real-time team collaboration, and you’ve got a system that identifies issues early, cutting down on expensive rework.
Even when crews are offline, CrewCam delivers. Photos are stored locally and sync automatically once a connection is available. This means your documentation is always up-to-date, whether you’re handling warranty claims months later or providing progress updates to stakeholders.
Sharable galleries and controlled access simplify communication across the board. Instead of digging through piles of unorganized images, you can create polished closeout packages that highlight every key detail from start to finish.
CrewCam’s annotation tools and live project feed keep everyone on the same page. Office teams can provide instant feedback, while foremen address and document issues in real time. This seamless coordination helps eliminate miscommunication and ensures consistent quality across all projects, reinforcing the workflows you’ve already established.
FAQs
How does CrewCam make photo documentation faster and more reliable for roofing projects?
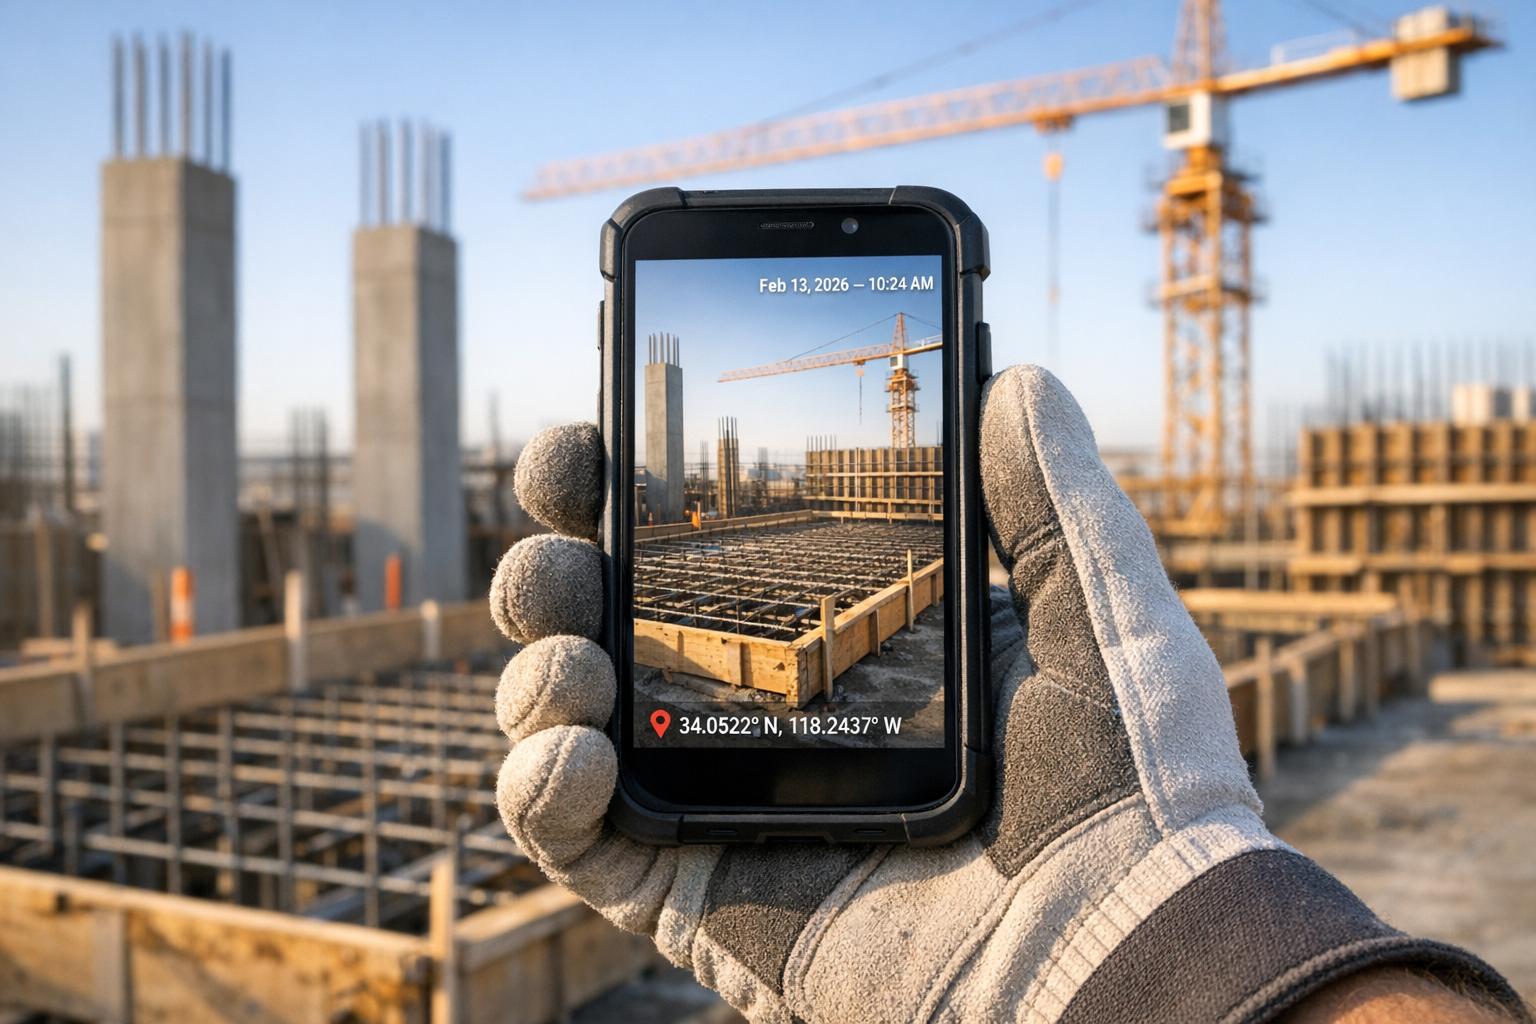
CrewCam makes photo documentation for roofing projects easier and more reliable by automatically adding timestamps and geo-tags to images. This creates precise records of jobsite conditions, boosting accountability and removing any uncertainty during project reviews.
Thanks to real-time photo uploads and a user-friendly organization system, team members can quickly find and share images. This reduces mistakes and saves time. By simplifying communication and improving project tracking, CrewCam helps roofing contractors stay efficient and deliver top-notch results.
How does CrewCam's offline mode help roofing contractors in areas with poor internet connection?
CrewCam's offline mode lets your team capture and store jobsite photos effortlessly, even in places with little to no internet access. When your device gets back online, all saved data syncs automatically, ensuring your documentation stays complete and current without any hassle.
This is a game-changer for roofing contractors working in remote areas, making sure no important photo documentation slips through the cracks due to connectivity problems.
How do CrewCam's photo checklists and annotations help roofing contractors comply with local building codes?
CrewCam's photo checklists and annotations provide roofing contractors with a straightforward way to stay on top of local building codes. By systematically capturing and labeling photos of safety checks, quality inspections, and important milestones, contractors can ensure every detail is documented clearly and accurately.
These tools also generate timestamped photo records, offering a reliable visual log for inspections or audits. With this organized trail, contractors can easily prove compliance with regulations, reduce the risk of fines, and simplify the approval process with local authorities.
Related Blog Posts
See CrewCam in action
Start your free trial now by clicking the button below


Wanna chat or demo?
Questions? Concerns? Requests? Talk to a real human

Watch a CrewCam demo now 😎
Short on time, busy, got jobs to do? See how CrewCam works now!